顯示包含「cakes/bread/tarts」標籤的文章。顯示所有文章

2013年11月27日星期三

chocolate mousse and cheesecake


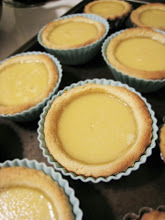
呢件是卡魯的生日蛋糕,是一個小小個的朱古力mousse & cheesecake
雖然佢冇份食,但睇見都好開心
哈哈...果然是為食bb

個蛋糕好易整架

材料:
Filling (for 4 1/2" 模)
  •  250g cream cheese   
  • 1/4 cup brown sugar   
  •  1 egg
  • 1/2 teaspoons vanilla extract   
  • 3oz semi sweeten/ dark chocolate
  • 1 tablespoon flour
Mousse
  • 1oz semi-sweeten/dark chocolate
  • 30g whipping cream
  • 1/4 tablespoon butter melted
  • 80g whipped cream 
做法
  1. 隔水煮溶朱古力,熄火
  2. cream cheese室溫待軟后,用mixer將brown sugar, vanilla extract & flour加入,最後加蛋
  3. 倒入蛋糕模,登2下,放入另用一個盤,盛些熱水,放入焗爐以180c 焗45-50分鐘,室溫待冷
  4. mousse: 先隔水分別座溶和座熱朱古力同30g whipping cream, whipping cream要煮得好熱,然後將之倒入溶了的朱古力,再快手搞拌至見到朱古力變"令"為至.再倒入牛油溶液.(我只倒了一半,怕肥嘛:p), 
  5. 將80g whipping cream 打起至7-8成, 慢慢fold-in 朱古力混合液,再輕手拌勻, 然後倒入cheesecake面,"登"下就放入雪櫃雪4小時或以上,食得.
食時我仲刨了些少白朱古力於蛋糕面:p
食完又真係要減肥了!!!!!!

2010年8月2日星期一

開始 回復 平靜

回來一個星期, 頭四天確實很難過,睡不著
心情低落
之後幾天   開始回復平靜
雖然偶爾跟家人通電時提到有關外婆時會心有戚戚然

不過我要告訴自己     生活是要繼續過的
活在回憶只會令自己更痛苦     更不理智   更敗事

我要令生活過得更好    才能令她安心
才能繼續保護我愛的人

今早去了踏單車   天氣   風景   都很美
也許這就是move on 的好開始

人云: 心情好整甜品就會弄得味道好
今次整了blueberry rolled oats crumble tart.
tart皮是超市的酥皮,只要將blueberry加約50ml糖粉拌勻, 再加上crumble就可以拿去焗(180'c)40分鐘

嗯...我都覺得硬身的tart皮比酥皮好吃! 


2010年5月15日星期六

紫芯蕃薯肉桂streusel卷


有一段時間沒有寫網誌, 先說說近況,我上班已有一個月, 雖然不能說每樣東西做得好, 總算都有進步,老闆也頗滿意我的工作表現,
也算不錯吧!希望再做好一點,就可以加薪啦! go! go! go!

難得這個星期六一
早起來, (6時許便醒了但又睡不過去)沒理由不练習一下整麵包, 今次就整的是 紫芯蕃薯肉桂streusel卷

這個卷不太甜且加了
streusel, 早餐食一件加一杯coffee or tea, 心情都好"令"啲.

食譜:

streusel :
(mix together)

  • all purpose
    flour                                15g
  • brown sugar      
                                   30g
  • ground
    cinnamon                               1/2 teaspoon                 
  • butter
    ( diced, room temperature )      30g 
sweet potatoes filling:
(mix together)
  • mashed purple sweet potatoes           300g
  • sugar                                                
    30g
  • butter                                                 40g
bread
ingredient:
  • 3 cups                         all purpose flour
  • 1
    1/2 tsp                     active dry yeast
  • 1                  
                 egg
  • 200ml                         warm milk
  • 3
    tbsp + 2 tsp             sugar
  • 1/4 tsp                       
    salt
  • 30 ml                          butter
  • 1 tbsp        
                    ground cinnamon      
Directions:
1.
Prepare a bowl, mix yeast ,sugar and 1/2 warm milk and stand 5 mins.
Preheat oven at 190'C
2. Use another bowl, mix and sift flour,
cinnamon, and salt.
3. Sift in the flour mixtures into #1, do add the
flour mixtures in several time. Add the egg.
4. Mix and knead until
the dough looks smooth and elastic, place the dough in room temperature
 
  or in a microwave with a cup of hot water for 1 hour or double in its
size.
5. Knead a while and rest 15 mins. Flatten the dough to about
1/2" thick, fill the mashed purple
    sweet potatoes and roll up.
6.Cut
the roll in 1" thick and place the cut side up on the sheet.Final stand
45 mins.
7. Glaze with egg and add streusel on the top
8. Bake
10-15 mins., let cool on the rack.

2010年4月25日星期日

japanese cheesecake

 
I have been working in a new job for 2 weeks, everything is new and fresh to me.
Although sometimes there were challenges, i was empathized by my boss and coworker when i did something wrong. Thanks God!

Yet, i don't want to be lazy on my bakery training. u know ...once you stop training, skills will be gone soon.:P So today i baked a Japanese cheesecake.
Some friends know that i love this cheesecake(esp. the one from 東海堂, i used to buy it once i arrived at law wu train station.)so much, and now i found the taste and the texture back. Thanks so much for the recipe's owner! She is the greatest.The feeling of melting in you mouth is incredible.JUST LOVE IT!

Also, i owe my mum a birthday cake, so i hope that  the cake isn't so late to present to her.....Sorry my dear mum.Wish you belated birthday!
May all the best is coming to you.Love you as always.

我可愛的媽媽:

 祝妳生日快樂,身體健康,美麗動人 :) !

永遠愛妳的女兒敬上

if you are interested in this cake, try this recipe please, i quoted from leisure cat recipe.


2010年2月14日星期日

po po go sing!!!!


Wishing every one a happy, healthy and prosperous year of TIGER.

Radish Cake Recipe: (for 2-3cakes)
Ingredients:
  • rice
    flour  2 cups
  • corn starch / 澄麵粉  1 cups
  • radish                  
    5 lbs/2kg
  • chinese sausages  4  pcs
  • dry
    mushrooms     10 pcs
  • dry scallops          3-4pcs
  • dry
    shrimps           1/2- 1 cups
  • sugar cane             1/2 pcs
  • oyster
    sauce 3 tbsp
  • salt               2 tsp
  • pepper        
    2-3 tsp / taste to serve
Directions:
  1. Put the dry
    scallops/shrimps/mushroom into water, stand1 hours or until tender.Steam
    the scallops with water for 20 mins.Save the water and tear the
    scallops into threads. 
  2. Peel the radish , mix and sift rice
    flour and corn starch.
  3. Cut mushrooms + Chinese sausages into
    fine grains.
  4. Heat pan in medium heat, add little oil and
    stir fry Chinese sausages + mushroom + scallops + shrimps for 2mins. Put
    them into a bowl and  add in the radish peels and a pcs of sugar
    cane.Cook until it is tenders and changes semi-colourless.
  5. Leave
    the pan from the heat, add oyster sauce + salt + pepper + 3 tsbps of
    scallops water , mix well. Add in the cooked Chinese sausages mixtures
    and stir well.
  6. Sift the flour in the mixtures in several
    parts.Mix well every time when it is added.
  7. Put the mixtures
    into the oil-sprayed trays. Steam the mixtures for 40-45 mins.


2010年2月11日星期四

香蔥麵包(老麵糰發版)


今次整了一條蔥花麵包   不過今次是用老麵糰混入的方法來做
原來用老麵糰整的麵包真的"令舍不同"
質感非常軟熟   
而且外層有少少脆
今次另一半吃后沒有"彈"過一句

哈哈....要讚一下自己   

雖然做法
比直接法的功夫多了一點     不過這份軟熟的回報
和可以塞住他的嘴巴的力量      都是值得的

*我用的還只是all
purpose flour 咋

食譜:
前一天準備
  • 老麵糰 : 用2茶匙dry active yeast加40ml暖水,待5分鐘加入 2杯麵粉(已篩) + 70ml水
             
+15ml 室溫牛油 拌勻並搓至光滑有彈性,於室溫stand 3小時,再放入雪櫃雪12小
              時,即成老麵糰
             
之后取半份來用,因為家裡沒有磅秤,我只將其平均分半
               (我看到網上食譜指其實於室溫stand
4小時已經可以成老麵糰,你也可參考)
     
  • 麵粉(已篩)   1杯 ,可用2杯代替全麥麵粉
  • 全
    麥麵粉已篩)  1杯
  • 快速乾酵母  1茶匙
  • 糖   3湯匙
  • 蛋 1隻
  • 鹽
    適量
  • 蔥花適量
  • 植物油少許
  • 炒過的芝麻 少許
  • 90ml 暖水
做
法:
  1. 先用少許暖水倒入盛有乾酵母的碗內.待5分鐘.同時混合麵粉+糖.
  2. 篩進麵粉於酵母內,加入蛋和老麵糰(可
    撕成細塊加入),逐少加入暖水搓揉至光滑和彈性,約25-30分鐘.
  3. 第一次發酵 60分鐘或至2倍大.取出,排氣,再醒10分鐘
  4. 造
    型,壓扁平,約1/4",塗一層植物油,灑上芝麻+鹽+蔥花,捲合
  5. 放入模內作第二次發酵, 約45-60分鐘.
  6. 放入
    180'C焗爐焗15分鐘.待涼脫模.食時才切件會保持得更好的彈性.

2010年1月28日星期四

coco walnut raisins bread


我常常整這個合桃提子乾可可麵包
因為合桃提子乾有益    加了可可粉甜甜的    有時在上面塗一層花生醬
幾種味道加在一起    
yum yum~

食譜:
材料:
  • 麵粉 1 1/2 cups all purpose flour +
    1cup whole wheat flour 或 2cups bread flour
  • 乾酵母  2 tsps
  • 糖
    45ml /3 tbsp
  • 蛋 1隻
  • 溫水  180ml
  • 合桃/提子乾/快熟燕麥   
    適量
  • 可可粉  2 tbsp
  • 牛油 30ml (室溫)
做法:
  1. 用
    60ml溫水倒入乾酵母和糖的混合物,待10分鐘
  2. 將可可粉和少許鹽加入麵粉,然后過篩備用
  3. 加入蛋於盛有酵母的碗,篩
    入麵粉混合物, 拌勻及揉至麵糰變光滑加入牛油再搓至有筋性.
  4. 第一次發酵,令麵糰發酵至1倍大,約1小時
  5. 排氣,加入
    合桃等物,揉勻
  6. 放麵糰入塗有牛油的模內,最后發酵1小時或發大至1倍大.
  7. 放入焗爐焗20分鐘@180'C.
    取出待涼脫模.

2010年1月17日星期日

芝麻花生卷


之前提過     班上同學大部份是中國人


我跟一位由天津來的同學仔學整他鄉煎餅


跟著她的口述的食譜去做        她用的是芝麻醬    我則改用花生醬代替      我以為自己這樣都會ok的


誰知第二天拿給她看看      她說那不是她的家鄉餅    反而有點似麵包卷      哈哈     不過同樣好味


雖然是種花不出花       但美味的麵包卷也不錯啦


食譜:


3杯麵粉   120ml暖水( 60ml x2)  乾酵母 2茶匙     糖50ml    牛奶 80ml    牛油(室溫) 30ml          芝麻 適量          蛋  1隻     蛋汁  適量       鹽 少許     cinnamon  1茶匙      花生醬  1杯    coconut flakes (sweetened)  適量


做法:


  1. Mix yeast and sugar, add 60ml warm water and let it stand for 10 mins.
  2. sift the flour,add in salt and cinnamon and mix well.
  3. add in order the flour, egg, milk and butter to the yeast mixtures, mix well and knead it until a smooth and clean dough is formed.
  4. let the dough stands for 1 to 2 hours or until double its size.
  5. release the air in the dough, flatten the dough to approx. 1/4" thick.
  6. coast on the peanut butter and coconut flakes, leave 1'' from the edge uncoasted.
  7. roll the dough up, cut it into 1" slices.
  8. lay flat the slices on the sprayed-pan and press a little bit
  9. coast the surface with egg and sprinkle with sesame seeds.
  10. bake the slices at 180'C for 18mins.  

2010年1月6日星期三

紅茶牛油曲奇


今晚又開爐,整了一盤紅茶牛油曲奇.

嗯....可能我用了泡了幾次的紅茶包,所以感覺紅茶味不太強(同時我又怕泡得太久的話會令曲奇變澀呢~anyway,下次要泡耐一點.)


不過我想說的重點是這個曲奇很鬆脆呢,不是誇口說,我覺得挺似赤柱老字號的呢~:p

哈哈....好想給你們試試.


食譜:


  • 材料: 紅茶  80ml

  • 紅茶渣 1包

  • 牛油  80ml  切粒於室溫放軟

  • 460ml低筋粉 ( 我用400ml all purpose flour 加 60ml corn starch)

  • 1/2 茶匙 baking soda

  • 1/2 茶匙 baking powder

  • 提子乾  適量

  • 蛋 1隻

  • 8 tablespoon brown sugar(約120ml)

做法:


  1. 將低筋粉+baking soda+ baking powder混合並過篩1次備用.

  2. 用打蛋器將牛油和brown sugar混合至淺色和變幼滑,加蛋再打散.

  3.  加入紅茶渣拌勻,再拌入麵粉混合物,再加紅茶然后拌勻 ***但不要大力按壓,以免麵糰出筋性.

  4. 最后加入提子乾拌勻.

  5. 取一小匙大的麵糰揉圓再壓平,放在有baking sheet的盤上,每個曲奇之間留1"距離.

  6. 放入焗爐用170'c焗20分鐘, let it chill 就可以喇.

這個份量約可以做30塊.enjoy~ ;).......相片后補啦

2010年1月2日星期六

Chinese walnuts cookies


新年快樂呀各位!


我又試了一樣"我的新餅點"----合桃酥


雖然知道它是十級肥膏製成, 但不知怎的就是好想試整出來


又加上另一半在旁邊扇風點火    就這樣我整了出來


外表和鬆脆度都很滿意呀    只是檸檬汁的份量下多了一點( 原因是我沒有加custard,網上有教可用檸檬汁或醋代替),吃完后口裡有點苦澀味.


食譜:


材料: 300ml all purpose flour          80ml corn starch        1/2 teaspoon baking soda + 1 tablespoon water             30g( 31ml) Egg        100g(123ml) sugar           70g(75ml) Lard(cubed)    walnuts     1/4 teaspoon( adjusted) lemon juice       3-4 tablespoons water


做法: 


  1. Sift and mix flour and corn starch,then  mix with sugar,lard,baking soda and lemon juice.
  2. Add in egg and walnuts.Mix the batter by hands. Try not to knead it hardly.
  3. Cut into balls and flatten.Place them on oil-sprayed sheet.Coat the surface with egg.
  4. Bake for 15-20 mins at 170'C.Place on rack to cool.


2009年11月4日星期三

italian sticks with cholocate cream n nuts


本來看到食譜想整 sticks with sliced olives and cilantro


突然就想起這個兒時小吃


過去       一個小杯放上幾條手指餅      加上一些朱古力醬.


吃一條       醃一點朱古力醬     當時已很滿足


整這些朱古力棒


也突然想到將來可以跟自己的小朋友一起弄


分享親子樂


也是另一份滿足


現在當然跟我的至愛分享


好好享受甜蜜時刻


如果"痺"親你   請見諒   只因這一刻的感覺的確很甜


2009年8月18日星期二

banana bread


ingredients:


  • 4 cups flours

  • 160ml  warm milk        15m lcold milk

  • 2 bananas and make to be buree

  • 45ml sugar

  • 1/2 teaspoon salt

  •  10ml  active dry yeast

  • 1 teaspoon butter

  • 1 egg

directions:


  1. leved flours twice and mix with salt. Preheat oven to 160'C

  2. mix yeast and sugar,pour in warm milk. add in flours gradually and mix.

  3. add in egg and cold milk. mix all stuff well and til tender and smooth.

  4. put the dough in a oil sprayed bowl and let it rise in draft-free place at warm room temp until double,1 to 1 1/2hrs.

  5. take out and divide into 3 parts, rest 20mins.put them into a baking pan and baked for 20mins.

芋茸椰絲卷


我愛吃芋頭但不能多吃,腸胃麻麻之故.


於是想點子來滿足自己,作甜包點就最好喇,因為每次吃少少就不怕多吃了.


很喜歡今次麵包軟綿綿的,配上椰絲芋茸的口感,很讚啊!!!!


材料:


  • 麵粉  980ml 另預備少許作dusting
  • 牛奶  a)160ml  b)80ml
  • 凍水      80ml
  • 鹽      1/4 茶匙
  • 糖       45ml
  • 速發乾酵母   10ml
  • 牛油 (軟)   1茶匙
  • 蛋   1隻

餡料: ***將芋頭蒸熟去皮製茸,與其他材料拌勻


  • 芋頭仔(細細粒的一類) 3個
  • 糖   45ml (如果椰絲不是甜的,就要加至60ml)
  • 椰絲  3/4杯
  • 牛油 (軟) 1茶匙

做法:


  1. 準備一個碗,將糖和酵母倒入並混合,將牛奶(a)整暖,我用微波焗叮01:35分,再混入,待10分鐘.
  2. 將麵粉過篩2次和鹽混合,分幾次倒入step.(1)碗內,加入蛋,攪勻,其間逐少加入凍水拌勻,取出麵糰於舖了少許麵粉的工作台揉至光滑柔軟.
  3. 加入牛油,再拌勻
  4. 放入一個已coat cooking spray的碗內,放入密封位置發酵1至1 1/2小時.
  5. 取出排氣,分4份麵糰,醒(chill) 20分鐘.
  6. 在工作台舖少許麵粉,將麵糰壓平,約1cm厚,餡料用刮刀舖平於麵糰上,將麵糰卷起並切段(約4cm闊).
  7. 放在噴了油的焗盤上,再作最後發酵至1倍大(約1小時).放入預熱了165'c的焗爐焗15-20分鐘.

2009年8月3日星期一

香草麵包


我又再整喇,今次試香草味.


材料:


  1. 高筋麵粉 (我用的是all purpose flour)  720ml
  2. dry active yeast     10ml
  3. 白砂糖        60ml
  4. 幼鹽         6ml
  5. 雞蛋         1隻 (室溫)
  6. 牛奶         a)  150ml (暖), b)  50ml
  7. 牛油        46ml (室溫至按下感柔軟)
  8. 水            20ml
  9. basil flakes 1 茶匙     

做法:


  1.  取一碗,落dry active yeast和糖,將6a的暖牛奶倒入,待10分鐘.
  2. 放入鹽,麵粉,雞蛋,水,將材料揉勻並揉至麵糰出筋度,再加入6b的牛奶和basil flakes並揉合(按麵糰的柔軟度加入份量)
  3. 逐少加入牛油於麵糰內並揉勻至有薄膜階段.
  4. 將麵糰放入預先塗了一層薄油的封閉的器皿內,於麵糰面噴上少許水,然後放入雪櫃冷藏18-24小時,發酵.
  5. 取出麵糰(冇須等回室溫),將麵糰分割成2份,將其滾圓,待它鬆弛20分鐘.
  6. 再做形狀,再等其發酵至2倍大時,面層塗上蛋汁(可不加),放入已預熱160'C的焗爐焗約20分鐘或至熟.完成.

2009年7月24日星期五

朱古力碎果仁曲奇


cherry cupcake


看上去是否似個蘋果呢,我也料不到它的頂部會拱起的,還以為會是平的.我想可能是加多了麵糰吧.

食譜基本上是用果醬frosting cupcake的.


食譜:(12個份量)


材料:


  • 1/2杯牛油(放至室溫用),另預少少作塗抹muffin 模用. 
  • 1 1/2杯all-purpose flour,另預少少作coat 模用
  • 1 1/2茶匙 baking powder
  • 2/3杯白砂糖
  • 1茶匙鹽
  • 2隻大蛋,放至室溫用
  • 1茶匙呍哩拿油
  • 1/2杯牛奶
  • 車厘子    12粒
  • 可可粉   2茶匙

做法:


  1. 預熱焗爐至於180'c, 在muffin模上塗一層薄牛油+麵粉,取一個大碗將鹽+麵粉+baking powder+可可粉混合.用beater將牛油+糖打軟和淺色.加入蛋,要逐隻加並每次打勻.之后加呍哩拿油拌勻.
  2. 將麵粉逐少加入(1)的糊中,同時又逐少加入牛奶.然後拌勻至沒有粉粒出現.
  3. 將麵糊倒入模,加入車厘子,放入焗爐焗20分鐘.取出焗模待5分鐘后取出cupcake放涼.

牛奶包(低溫發酵法)


我愈來愈愛整麵包,因為它比蛋糕健康點,材料不用消耗那麼多.至於揉的那部份,嗯...我都okay enjoy的,而且整包又有挑戰性和滿足感大一點ma~


在網上找到一個幾得意的食譜,叫低溫發酵法,看到其方法我也未試過,就試一下吧. 此食譜可做約16個小包或像我的4個大麵包.


材料:


  1. 高筋麵粉 (我用的是all purpose flour)  714ml

  2. dry active yeast     4ml

  3. 白砂糖        74ml

  4. 幼鹽         6ml

  5. 雞蛋         1隻 (室溫)

  6. 牛奶         a)  150ml (暖), b)  30ml

  7. 牛油        46ml (室溫至按下感柔軟)

  8. 水            20ml     

做法:


  1.  取一碗,落dry active yeast和糖,將6a的暖牛奶倒入,待10分鐘.

  2. 放入鹽,麵粉,雞蛋,水,將材料揉勻並揉至麵糰出筋度,再加入6b的牛奶並揉合(按麵糰的柔軟度加入份量)

  3. 逐少加入牛油於麵糰內並揉勻至有薄膜階段.

  4. 將麵糰放入預先塗了一層薄油的封閉的器皿內,於麵糰面噴上少許水,然後放入雪櫃冷藏18-24小時,發酵.

  5. 取出麵糰(冇須等回室溫),將麵糰分割成4份,將其滾圓,待它鬆弛20分鐘.

  6. 再做形狀,再等其發酵至2倍大時,面層塗上蛋汁,放入已預熱180'C的焗爐焗約20分鐘或至熟.完成.

將麵包切成塊狀烘乾醮果醬或花生醬就是最佳早餐喇.雖然買的是容易多了,不過自家製的沒有太多添加物ma~


enjoy!!!

2009年7月16日星期四

藍莓可可蛋糕


夏天是藍莓和車厘子當造的時候,而在加拿大這些水果是便宜的.2磅的藍莓賣約50港元,2磅車厘子賣約30港元,比起在香港真的"平"得多,又好新鮮.


我用了全蛋法,因為我不吃太甜的,故沒有先將藍莓用糖煮過.


材料:


  • 藍莓   半杯
  • 蛋        2隻 (室溫)
  • 麵粉    1 1/2杯
  • 牛奶    80ml
  • 糖(brown sugar)   1/2杯
  • baking powder      1茶匙
  • 可可粉(coco powder)  1茶匙
  • 鹽         1/4 茶匙
  • 植物油   1/2杯


做法:


  1. 預熱焗爐至180'C, 在6寸餅盤底和邊塗上少許牛油,洒少許麵粉,備用.
  2. 用一個大碗,篩入麵粉,鹽,可可粉,baking powder並拌勻.
  3. 用另一個碗,加入糖,植物油,用電動beater拌勻至淺黃色,柔軟.
  4. 逐次放入雞蛋1隻.再拌勻.
  5. 逐少加入麵粉和牛奶,拌勻.
  6. 再放入藍莓拌勻,倒入餅盤.放入焗爐焗30分鍾或至熟,等30分鐘脫模再待至涼便可.

2009年6月11日星期四

果醬檸檬frosting cupcake


這個cupcake好好味呀!嘻嘻...我又賣花喇~不過真係好香生果味,如果你鍾意食生果,應該唔會抗拒它.


做法都好簡單的.


食譜:(12個份量)


材料:


  • 1/2杯牛油(放至室溫用),另預少少作塗抹muffin 模用. 
  • 1 1/2杯all-purpose flour,另預少少作coat 模用
  • 1 1/2茶匙 baking powder
  • 2/3杯白砂糖
  • 1茶匙鹽
  • 2隻大蛋,放至室溫用
  • 1茶匙呍哩拿油
  • 1/2杯牛奶

  • cranberry/rasberry/blueberry 果醬 適量
  • 檸檬碎1湯匙
  • 檸檬汁1茶匙
  • 即用creamy frosting vanilla flavour 約150g

做法:


  1. 預熱焗爐至於180'c, 在muffin模上塗一層薄牛油+麵粉,取一個大碗將鹽+麵粉+baking powder混合.用beater將牛油+糖打軟和淺色.加入蛋,要逐隻加並每次打勻.之后加呍哩拿油拌勻.
  2. 將麵粉逐少加入(1)的糊中,同時又逐少加入牛奶.然後拌勻至沒有粉粒出現.
  3. 將麵糊倒入模,放入焗爐焗20分鐘.取出焗模待5分鐘后取出cupcake放涼.
  4. 將檸檬汁和碎放入frosting攪拌至混合.用刀將蛋糕面中心位繞圓形界出一個cone型(這個cone型蛋糕可要可不要,如果要的話,則切剩面層,待釀入果醬后鋪返上蛋糕面就ok.)放1茶匙果醬.然后於面放1湯匙混好的frosting在蛋糕面,待frosting凝固就ok喇~

2009年6月10日星期三

PIZZA


Honey生日的晚餐其中一款便是這個pizza.


因為最近買了一些baking的用具,貪得意拿一個印餅模出來玩玩.


食譜:(8件)


材料:A) 麵粉 260g     乾酵母 1茶匙   暖水(110'f) 100ml   糖,鹽各1茶匙    植物油5ml    黑椒少許


         B) pepperoni 50g(切小薄片)    菠蘿粒 50g    mozarella 適量    茄醬 2/3杯   basil  


              leaves flakes少許


做法:


1)薄餅皮: 將暖水同酵母混合,加鹽和糖,之后加篩過的麵粉,搓麵糰至光滑有彈性,再加植物油搓勻.將麵糰放在室溫85'f放1小時發酵或至1倍大.之后壓出空氣,再等10分鐘,之后就可以下一步.此時可用印模印出所需要的形狀.


2)將麵糰壓平,在上面塗上茄醬+芝士+pepperoni+菠蘿+黑椒粉+芝士,用200'C焗6-7分鐘